
Hello and welcome back, in this blog I am going to explain how to utilize widgets to add content to our side bars and footer?
Widgets: – Widgets are stand-alone blocks of content that can be added to any widgets area of your theme provides. Widgets areas are typically the left and right sidebars as well as the footer of the site. For example: Assume that there is a WordPress website having a Twenty Fourteen theme which is known as a “Beautiful Magazine theme”, open in front of us and currently on its left side are present the search widget, Recent post widget, recent comments widget, Archives Widget, Categories, and Meta, etc. In the footer, we have a page-list Widget.
To access the widget sub panel hover over the quick- access tool bar and then click Widgets.
Alternatively you can access the widget subpanel by hovering over Appearance and then selecting Widget.
In the widgets subpanel, you can add, delete, edit or rearrange the widget. On the left is a list of available widgets and on the right, you can see an overview of the widgetized areas as well as the widgets in those areas.
The list of widgets and the number of widgetized areas will vary depending on the theme you are using.
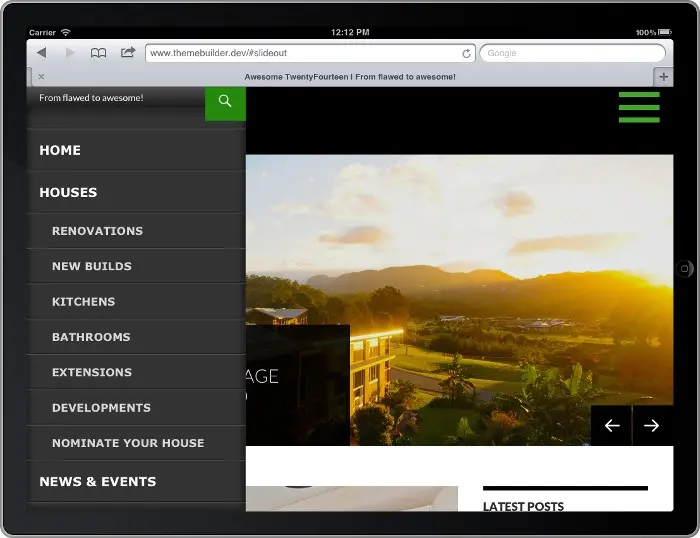
It’s also worth noting the names of widgetized areas may be named differently. We are currently viewing the WordPress theme called Twenty Fourteen and this theme comes with a custom widget called twenty Fourteen a ‘Flawed beauty’.
This theme supports 3 widgetized areas –
1. Primary sidebar
2. Content sidebar and
3. Footer widget area.
The Primary Sidebar: is the first to the area on the left of the theme and the content sidebar refers to the right side of the theme. Currently assume that the right sidebar isn’t showing because the website does not have any widgets in that area.
The footer widget area currently belongs to the bottom of the site. It is also currently blank due to the widgetized area being empty.
To edit these settings for a widget, simply click the down arrow on the right side of a widget.


Let’s open a new tab so that we can view the front end of our website:
Hover over your site name right click on my sites and open a new tab. In this new tab, you can see Search widget, Recent Posts, Recent Comments, Archives, Categories, and method.
The display order of these widgets can response directly to the primary sidebar area you see.
The search widget on the left does not have a title. So let’s go ahead and add a title. Go back to the widget sub panel and expand these search widgets – enter a title and click save. Go to the front end of your site and refresh the page, the search widget now has a title.
To add a widget simply drag the widget to the area you prefer or you can click on a widget and from the popup menu choose the widget destination and then click add widget. The display order of widget can be rearranged by dragging and dropping them into a new order. Or you can drag them into a new area.
To delete a widget simply drag the widget into the available widget box or you can expand the widget settings and then click delete. If you just want to deactivate the widget using widget settings, drag it to the Inactive Widgets area.
To reactivate the widget simply drags it back.
Let’s refresh the front end of our website and have a look at the changes we made so far.
As you can see the sidebar on the left only contains the search, categories, methods and calendar widgets.
While the recent posts, recent comments and archives widgets have been moved to the footer.
We are also going to add some content to the right sidebar. Go back to the widgets sub panel and drag the Twenty Fourteen theme widget into the content sidebar.
This widget allows us to display a selected post, to format for this widget we are going to display video posts and to a little set the number of posts you would like to show choose the video format and save. Refresh your site and you should see the widgets active in the right side sidebar. One thing to remember is that widgets are not single-use, meaning you can drag the same widget into any areas as many times as you like.
For example, we have dragged another Twenty Fourteen widget into the content sidebar but this time we will set post formats to display audio posts. Hit save and refresh your website. You will now see audio posts displayed within the widget. Go back to the widget sub panel and we will have a look at the text widget.
The text widget is extremely flexible; it allows you to add plain text as well as HTML.
Some common applications for the text widget include adding copy write messages displaying newsletters, signup form, displaying social elements or miscellaneous texts just to name a few.
We will add a bit of a code to embed a tweet from wordpress. org.
First, go to twitter. Com/ WordPress this is the official tweeter account for WordPress. Choose a tweet you like, click on more, just under it and then click embed tweet. Copy this code. Go back to the widget sub panel and drag a text widget into the content sidebar, enter a title and then paste the code into the content field.
Click ‘Save’. Before we view our sidebar, let’s also add in a copy write a message in the footer. Expand the text widget in the footer area. If you don’t have a text widget in the footer area simply drags one over. Enter a title, then add a copy write message, hit save, and then refresh your website. We can see the tweet from WordPress is now displayed on the right sidebar and the copy write message is now displayed in the footer.
You may be wondering what the automatically add paragraph checkbox is?
Let me demonstrate:
If you recall, the editor for post and pages had 2 editing modes, visual and text. The text widget is essentially a simple plain text editor which means any formatting of detail text will require a code.
Let me demonstrate it again:
Now add the new text widget to the content sidebar and place it at the top. Then now enter a title and paste some content, I prepared earlier.
The text looks quite messy at the moment, so I tied it up quickly. The formatting of text looks ok. Now but let’s see what happens when I save it and refresh the website? Even though we formatted the text properly in the widget’s settings the text is still showing as one huge bunch of text.
We can fix this by adding them a simple HTML tag – This tag is called the Paragraph tag. And lets browsers know that the text content within the tag is a paragraph.
Let’s view the site again. As you can see the text is now formatted correctly. If you are not familiar with an HTML or you dislike coding, this is where the checkbox comes in handy. And Go ahead and delete the paragraph tags and check the box and refresh.
As you can see we do not have the paragraph, tags anymore, but the text is still properly formatted. In a nutshell, the checkbox tells WordPress to automatically add paragraph text every time it detects a blank line.
Now that you are familiar with widgets, try to apply it to your website. I hope you find this information helpful. If you have any suggestions, comments then leave them in the comment section below.
Visit- Best WordPress Hosting Company
You must log in to post a comment.